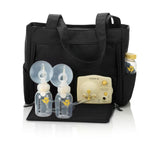
MEDELA Pump In Style Advanced On The Go Tote, -- ANB Baby

MEDELA Pump In Style Advanced On The Go Tote

Brand: Medela
SKU: 5O-BJSA-7TOX
Availability: Out Of Stock
$246.00
$0.00
$246.00
MEDELA Pump In Style Advanced On The Go Tote, -- ANB Baby

Brand: Medela

MEDELA Pump In Style Advanced On The Go Tote

$0.00 $246.00

Brand: Medela

MEDELA Pump In Style Advanced On The Go Tote

$0.00 $246.00

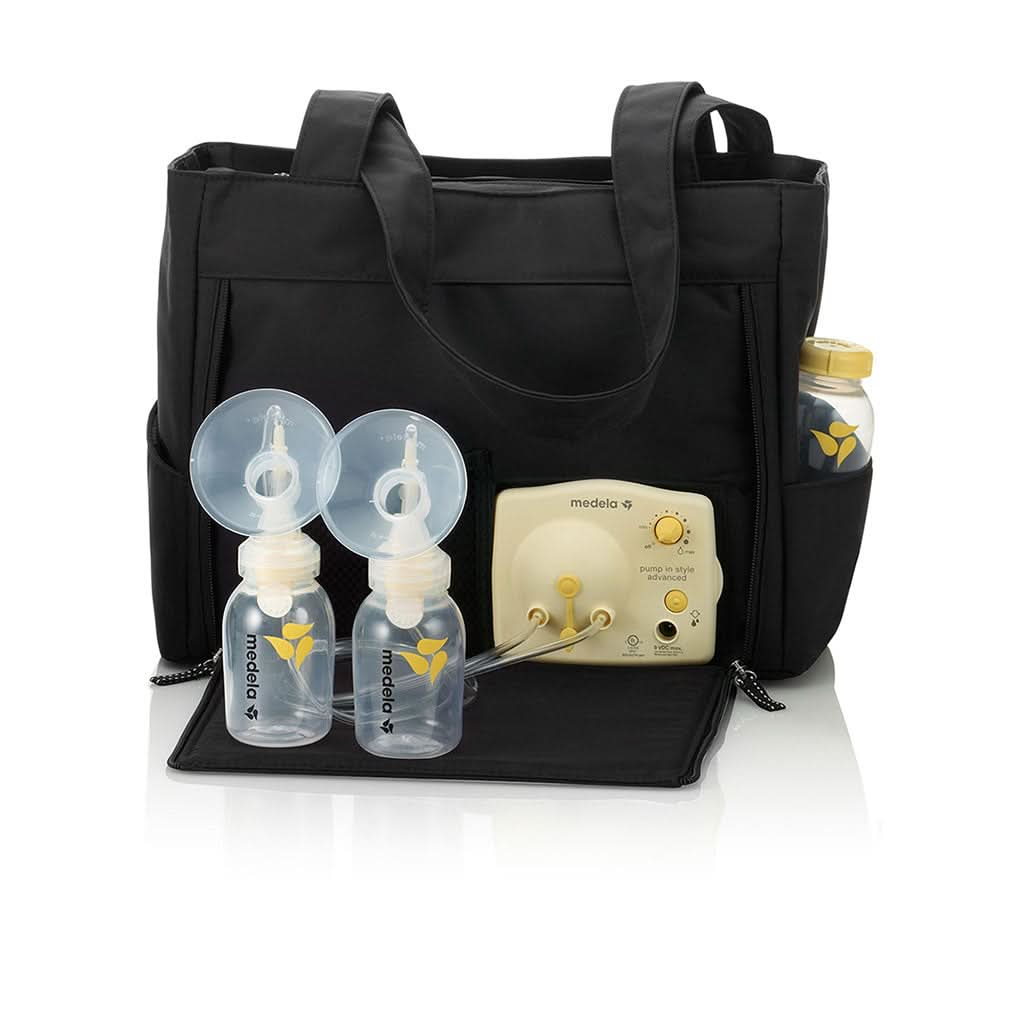
The Medela Pump in Style Advanced with On the Go Tote combines an award winning double electric breast pump that has consistently been chosen for over two decades by busy moms with a discreet, stylish tote bag for easy portability and transportation of the pump and all necessary accessories to ensure convenient pumping at home or away. Now includes convenient dual voltage for 110-240V, allowing moms to easily use their Pump in Style Advanced Breast Pump while traveling outside the U.S. Engineered to more closely mimic a nursing baby with patented, research-based 2-Phase Expression technology which produces more milk in less time for efficient expression and maximized flow.

The On the Go Tote helps keep bottles, tubing, and other essential components and accessories neatly organized for convenient transport anywhere. Try the Medela Pump in Style Advanced and find out why decades of moms have made Medela their first choice for all their breast milk feeding needs. 

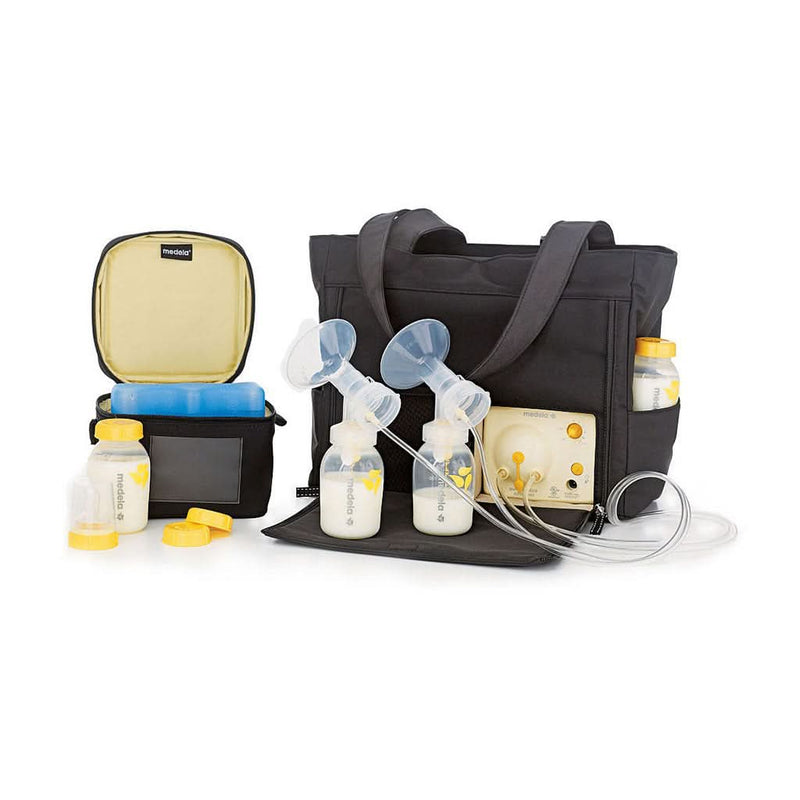
What's Included in the MEDELA Pump In Style Advanced On The Go Tote: 

  • 1 Pump In Style Advanced featuring Medela's patented 2-Phase Expression® technology 
  • 1 cooler bag with ice pack
  • 4 breast milk bottles with lids
  • 1 double pumping kit with PersonalFit™ breast shields
  • 1 power adaptor
  • Battery pack lets you pump anywhere, anytime (8 AA batteries not included)

Specifications:

Includes everything you need to pump in a stylish tote. Double electric with 2-Phase Expression.


FAQ's:

What do I do if there is low or no suction when pumping with the Pump In Style?

  1. Make sure all connections of the kit and breastpump are secure.
  2. If single pumping, make sure the port plug is placed into one of the single pumping ports.
  3. Make sure white membrane is laying flat against the yellow valve head.  Check that the yellow valve head is clean and not damaged. Refer to the assembly instructions.
  4. Make sure the diaphragm cap or faceplate on the front of the breastpump fits evenly and securely.
  5. Make sure the ends of the tubings are fit securely into the backs of the breastshields and into the ports on the diaphragm cap or faceplate.

How do I dry & store the breast pump kit?

Allow all breast pump kit parts to air dry in a clean area and store dry parts when not in use.  Do NOT store wet or damp parts.

What is a microfiber bag?

Microfiber is a polyester blend that has many fibers (threads) per square inch. This gives the On-The-Go-Tote, Backpack, and The Metro Bag their stylish and luxurious look.

Does altitude affect the suction level?

The higher the altitude, the more chance the suction level will decrease.

How do I clean the breast pump kit?

Before using for the first time, clean and sanitize kit parts: breast shields, breast shield connectors, white membranes, yellow valves, breast milk bottles and lids.

CAUTION: Take apart and wash all parts that come in contact with your breast and breast milk immediately after use to avoid dry up of milk residues and to prevent growth of bacteria.


CAUTION: Only use drinking quality-tap or bottled water for cleaning.


CAUTION: Do not store wet or damp parts as mold may develop.


Clean breast pump kit parts after each use.

1     Separate breast shields from breast shield connectors.

2     Twist and pull the yellow valves off of the breast shield connectors.

3     Remove the white membranes from the yellow valves.

4     Rinse in cool water all separated parts that came in contact with your breast and breast milk in order to remove breast milk residue.

5     Washing options: Wash in sink or dishwasher.

A     Washing in sink:

  •   Soak all separated parts in warm soapy water for 5 minutes.
  •   Clean with a clean dish-cloth or soft brush.
  •  Rinse all separated parts with clear water.
  •  Allow all parts to air dry in a clean area.
  •  Store dry parts when not in use.

      B    Washing in dishwasher:

  •  Wash all separated parts on top rack of dishwasher.
  •  Allow all breast pump parts to air dry in a clean area.
  •  Store dry parts when not in use.


How do I sanitize the breast pump kit?

Before using for the first time, clean and sanitize kit parts: breast shields, breast shield connectors, white membranes, yellow valves, breast milk bottles and lids.

CAUTION: Take apart and wash all parts that come in contact with your breast and breast milk immediately after use to avoid dry up of milk residues and to prevent growth of bacteria.


CAUTION: Only use drinking quality-tap or bottled water for cleaning.

CAUTION: Do not store wet or damp parts as mold may develop.

Sanitize breast pump kit parts once daily.


1     Fill a pot with enough water to cover all parts.

2     Bring water to a boil.

3     Place parts in boiling water for 10 minutes.

4     Allow water to cool and gently remove parts from water with tongs.

5     Place parts on a clean surface and/or towel.

  •         Allow parts to air dry
  •         Store parts when not in use.
  •         Do NOT store wet or damp parts.

Or you may sanitize your kit parts by following the instructions on Medela’s Quick Clean™ Micro-Steam™ bag.


Is there a quicker way to clean the breast pump kit?

You can use Quick Clean™ Soap, Quick Clean Wipes or Quick Clean Micro-Steam™ bags. Please follow instructions included with each of the Quick Clean products.

How do I clean the tubing and faceplate?

Clean the faceplate monthly. Also, inspect tubing after each pumping session. Clean tubing and faceplate if there is any sign of condensation and/or milk.


CAUTION: If tubing becomes moldy, discontinue use and replace tubing.

CAUTION: Do not store wet or damp parts as mold may develop.


NOTE: Tubing should be washed if dirty or milk is present.

NOTE: Make sure faceplate and diaphragm are completely dry before reseating.

NOTE: The faceplate must be seated correctly and snapped together at all connection points. This ensures the pump will have adequate vacuum and optimum performance.


1     Turn off breast pump

2     Unplug breast pump from power source.

3     Remove tubing by pulling straight out of tubing ports. Do not wiggle or pull tubing at an angle.

4     Remove tubing from breast shield.

5     Rinse tubing in cool water to remove breast milk.

6     Wash tubing in warm soapy water.

  •          Rinse tubing with clear water.
  •          Hang to air dry.

7     Snap off the faceplate using the thumb tab.

8     Soak in warm soapy water for 5 minutes.

  •          Clean with a clean dish-cloth or soft brush
  •          Rinse parts with clear water.
  •          Allow to air dry in a clean area.
  1.          Wipe diaphragm with a clean (no soap), damp cloth.
  •          Allow to air dry in a clean area.

10  Locate the 3 connection points on the reverse side of the faceplate and on the pump.

11  Align connection points and hold back of pump with one hand while pushing on the faceplate until it snaps into place.


Can the Pump In Styles be repaired at Medela or local repair center?

Call Customer Service for any type of service needed to your pump. We will troubleshoot to determine the cause of malfunction and help you to restore it to working order. Medela does not repair motors of personal care products like the Pump In Style even within its warranty. If within warranty, we may replace the unit after verifying the purchase date with a copy of your receipt. If outside warranty, we suggest purchasing a new unit.

What materials are the kits and bottles made out of?

Medela breastmilk bottles and all our products that come in contact with breastmilk are and always have been 100 percent BPA-Free. Medela breastmilk bottles, storage containers, feeding products and breast pump kits are made with polypropylene. All existing research maintains that polypropylene is safe.

How long will the battery last on the Pump In Style?

The Pump In Style Battery Pack is intended for use with Pump In Style breast pumps (manufactured in January 2008 and later) ONLY.

The Battery Pack uses 8 AA alkaline batteries, or, for more consistent pump performance, use rechargeable batteries.

Each will provide approximately 2 hours of pumping time. It is recommended that batteries be replaced or recharged between the 10th and 12th pumping session.

What do I do if milk gets in the tubing?

Inspect tubing after each pumping session. Clean tubing if there is any sign of condensation and/or milk.

CAUTION: If tubing becomes moldy, discontinue use and replace tubing.

CAUTION: Do not store wet or damp parts as mold may develop.


NOTE: Tubing should be washed if dirty or milk is present.

1     Turn off breast pump

2     Unplug breast pump from power source.

3     Remove tubing by pulling straight out of tubing ports. Do not wiggle or pull tubing at an angle.

4     Remove tubing from breast shield.

5     Rinse tubing in cool water to remove breast milk.

6     Wash tubing in warm soapy water.

A     Rinse tubing with clear water.

B    Hang to air dry.


How much milk should I produce?

In the past it was thought that mothers needed to make more and more milk as their babies grew.  Scientists now know that a healthy milk supply remains fairly constant over the six (6) months of exclusive breastfeeding.  Your baby will take the amount he needs.

During the early weeks, babies eat very frequently and grow very quickly.  By day 10-14, babies should regain any weight they lost after birth. For the next few months babies will gain about an ½ ounce to 1 ounce a day. 

Around three (3) to four (4) months, a breastfed baby’s rate of grown begins to slow down.  Your milk supply will continue to satisfy the baby until it is time to introduce solids at 6 months.

Be the end of the first week of life, women who are breastfeeding one baby normally make between 19 to 30 ounces of milk each day.  Infants between one (1) and six (6) months of age normally drink an average of 19 to 30 ounces a day. 

An average size “meal” for a baby is between three (3) to five (5) ounces of breastmilk.  Formula is harder to digest and less well absorbed. Formula fed babies may need larger feeds.  Consult your healthcare professional for advice.

How long can breast milk be kept in a cooler carrier?

  • You can safely store your breast milk for up to 10 hours* with Pump In Style Advanced and Freestyle breast pump cooler bags.   
  • Direct exposure to the sun, like leaving the cooler in a car, severely reduces the cooling effectiveness. 
  • Breast milk is safe stored in a cooler at/or below 59 degrees for up to 24 hours.
  • The liquid inside the cooling elements is water with food grade dye. The liquid is non-toxic.
  • Medela does not have recommendations for storing breast milk with dry ice. Consult a lactation consultant or healthcare provider for further information.
     

*When ice pack is frozen solid

How should I power my breast pump while traveling outside the United States?

Pump in Style recently updated it’s AC power adaptor as of June 1st, 2019.  With this new adaptor, when traveling internationally, there are 3 power options:

  1. Use the Battery Pack that was included with your Pump In Style® Advanced breast pump.
  2. Purchase the 9 volt Portable Vehicle Adaptor (sold separately) item 67174.
  3. Use the power adaptor that was included with your Pump in Style® Advanced breast pump with universal prong converters (sold separately, not a Medela item)

Please note: The previous Pump in Style Advanced power adaptor (item number 68030 or 9207010) is not compatible outside of North America. Please call Medela Customer Service if you have any questions identifying which power adaptor came with your breast pump.

Can a universal power adaptor work with Pump in Style Advanced breast pumps?

The Pump In Style Advanced power adaptor (68030 / 9207010) is a linear power supply that is designed for use with standard U.S. outlets. Use of this adaptor outside the United States may result in breast pump motor damage and unpredictable operation.

As of June 2019, All Pump in Style breast pumps have been updated with a dual-voltage power adaptor 110-240v.  If you have an older power adaptor (68030/9207010) you may purchase the new power adaptor (101036649) for international use. Please call Medela Customer Service if you have any questions.

What do I do if milk gets behind the faceplate on the Pump In Style?

Clean the faceplate monthly. Also, inspect tubing after each pumping session. Clean tubing and faceplate if there is any sign of condensation and/or milk.


CAUTION: If tubing becomes moldy, discontinue use and replace tubing. Contact Medela Customer Service at 1-800-435-8316.

CAUTION: Do not store wet or damp parts as mold may develop.


NOTE: Tubing should be washed if dirty or milk is present.

NOTE: Make sure faceplate and diaphragm are completely dry before reseating.

NOTE: The faceplate must be seated correctly and snapped together at all connection points. This ensures the pump will have adequate vacuum and optimum performance.


1     Turn off breastpump

2     Unplug breastpump from power source.

3     Remove tubing by pulling straight out of tubing ports. Do not wiggle or pull tubing at an angle.

4     Remove tubing from breastshield.

5     Rinse tubing in cool water to remove breastmilk.

6     Wash tubing in warm soapy water.

  •          Rinse tubing with clear water.
  •          Hang to air dry.

7     Snap off the faceplate using the thumb tab.

8     Soak in warm soapy water for 5 minutes.

  •          Clean with a clean dish-cloth or soft brush
  •          Rinse parts with clear water.
  •          Allow to air dry in a clean area.

9     Wipe diaphragm with a clean (no soap), damp cloth.

  •          Allow to air dry in a clean area.

10  Locate the 3 connection points on the reverse side of the faceplate and on the pump.

11  Align connection points and hold back of pump with one hand while pushing on the faceplate until it snaps into place.

Related Products